the abridged version of CPS2 resurrection: (if you don’t like long stories)
-completely remove dead battery (clean up however needed)
-obtain decrypted ROMs
-program ROMs 3 and 4 (27C4096)
for more information about CPS2 hardware, what a “suicide battery” is and does, or if uncertain of board status in event of potential damage, resources and a CPS2 Suicide Test ROM image can be found here: https://cps2shock.emu-france.info/
the highly detailed and thorough version of CPS2 resurrection:
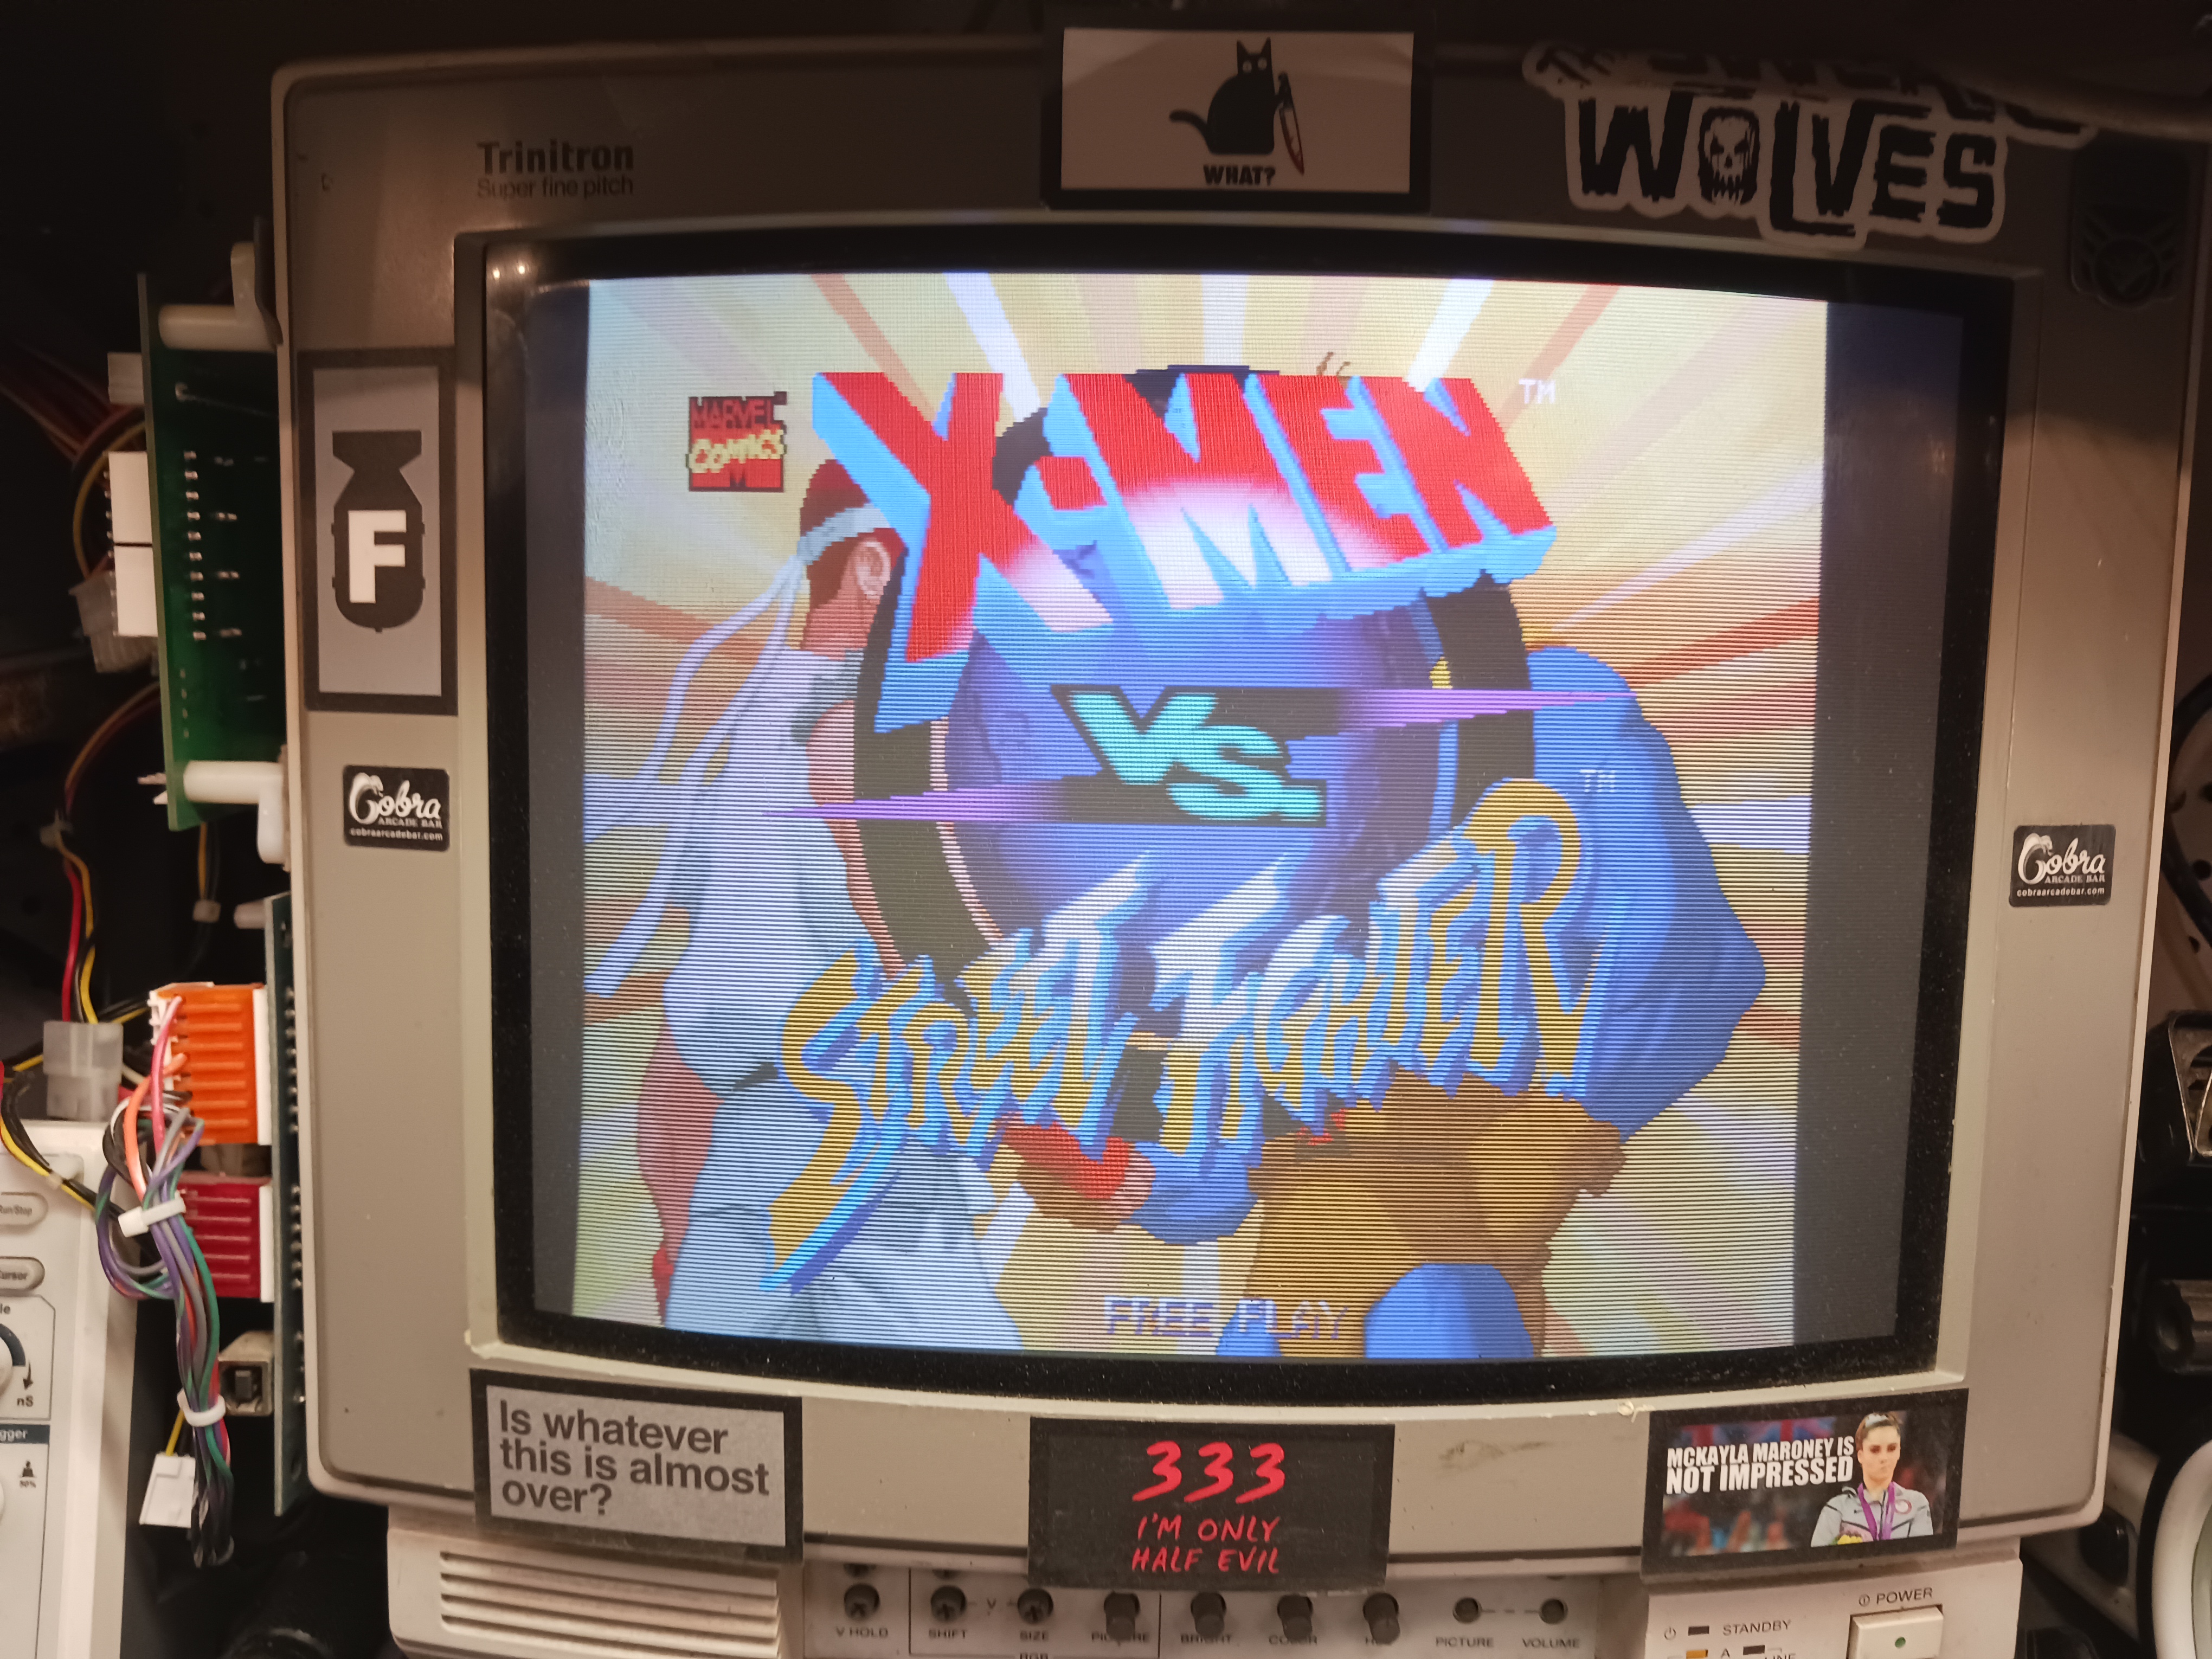
I’d seen an X-Men vs. Street Fighter (XVSF) cabinet in the warehouse and for months I kept saying “we should probably look at that”, as there had been another a few months back that got wrecked so bad the board had to be thrown away. a “Marvel vs. Capcom 2” was next to it that I found was not NAOMI but had a CPS2 board of unknown description inside it. after that was wheeled into the work room it was revealed to be a Marvel vs. Street Fighter (MVSF), which worked fortunately. XVSF was accessible to me in the warehouse (even the back door was already off). despite the board having the metal clips holding the halves together, they also duct taped the boards together to muck up an otherwise good condition B board case. judging by how the tape fell apart when I took the board out of the game, it seemed this game hadn’t been touched in a long time, which can spell disaster for any game with alkaline, NiCAD, or lithium batteries. while removing the B board you could hear something rattling around inside. I had a similar experience a few years prior, so now it was autopsy time.
the battery had broken off (and left a mess behind)
on a scale of 1-5 (5 being worst), this board was probably like a 3. the other XVSF was a solid 5, the battery outgas destroyed a custom chip and some of the graphic roms. this board seemed promising, but seeing orange and green stuff inside, I took this to the sink to give it a bath with toilet bowl cleaner.
this custom looked like it had fur
toilet bowl cleaner will eat up the battery goo, it goes on blue and will turn clear when it’s ready to be rinsed off. after awhile you then wash the board with Simple Green and brush delicately. that custom chip pictured above concerned me with the cleaning process, so I didn’t brush too hard so as to not risk breaking off legs. (ultimately, it was solid, good thing)
to the sink for cleaning
the legs of the custom looked much cleaner afterwards, but most importantly they didn’t break off
there was CPS2 Suicide Test ROM that I wanted to try out, but didn’t know where it needed to go. looking for the decrypted roms for XVSF, I found the readme file for the Test ROM; the rom went into the 3 socket. much to my surprise it passed all its tests and started playing music, the hardware apparently survived, so I could move on to programming new roms. the originally encrypted roms are located at sockets 3 and 4, these are 27C4096s (our Wellon programmer didn’t need an adapter, but a GQ-4X will need a 16-bit adapter to work with roms of this capacity). replacing those 2 roms, I now had XVSF working again, but with a slight caveat…
some of the character sprites were messed up
I mention this detail for posterity, as I had come across this issue on the previous battery board. the goal was to reuse as many of the original graphic mask roms as possible, but I recall graphic roms 19 and 20 (which were closest in proximity to the exploded battery) were hosed from battery damage. EPROM replacements were used instead. I therefore set out to test all the graphic roms, but didn’t know what compatible device they were comparable to. the MAME rom images were 4 megabytes, multiply by 8 and you get 32 megabits, so they matched 27C322s. every one of the graphic roms came up on Romident, meaning they weren’t the source of this graphics fault.
putting the roms back in I noticed that the solder jumpers below the graphic rom section looked a little strange (notice the solder pads were bronzed from the toilet bowl cleaner)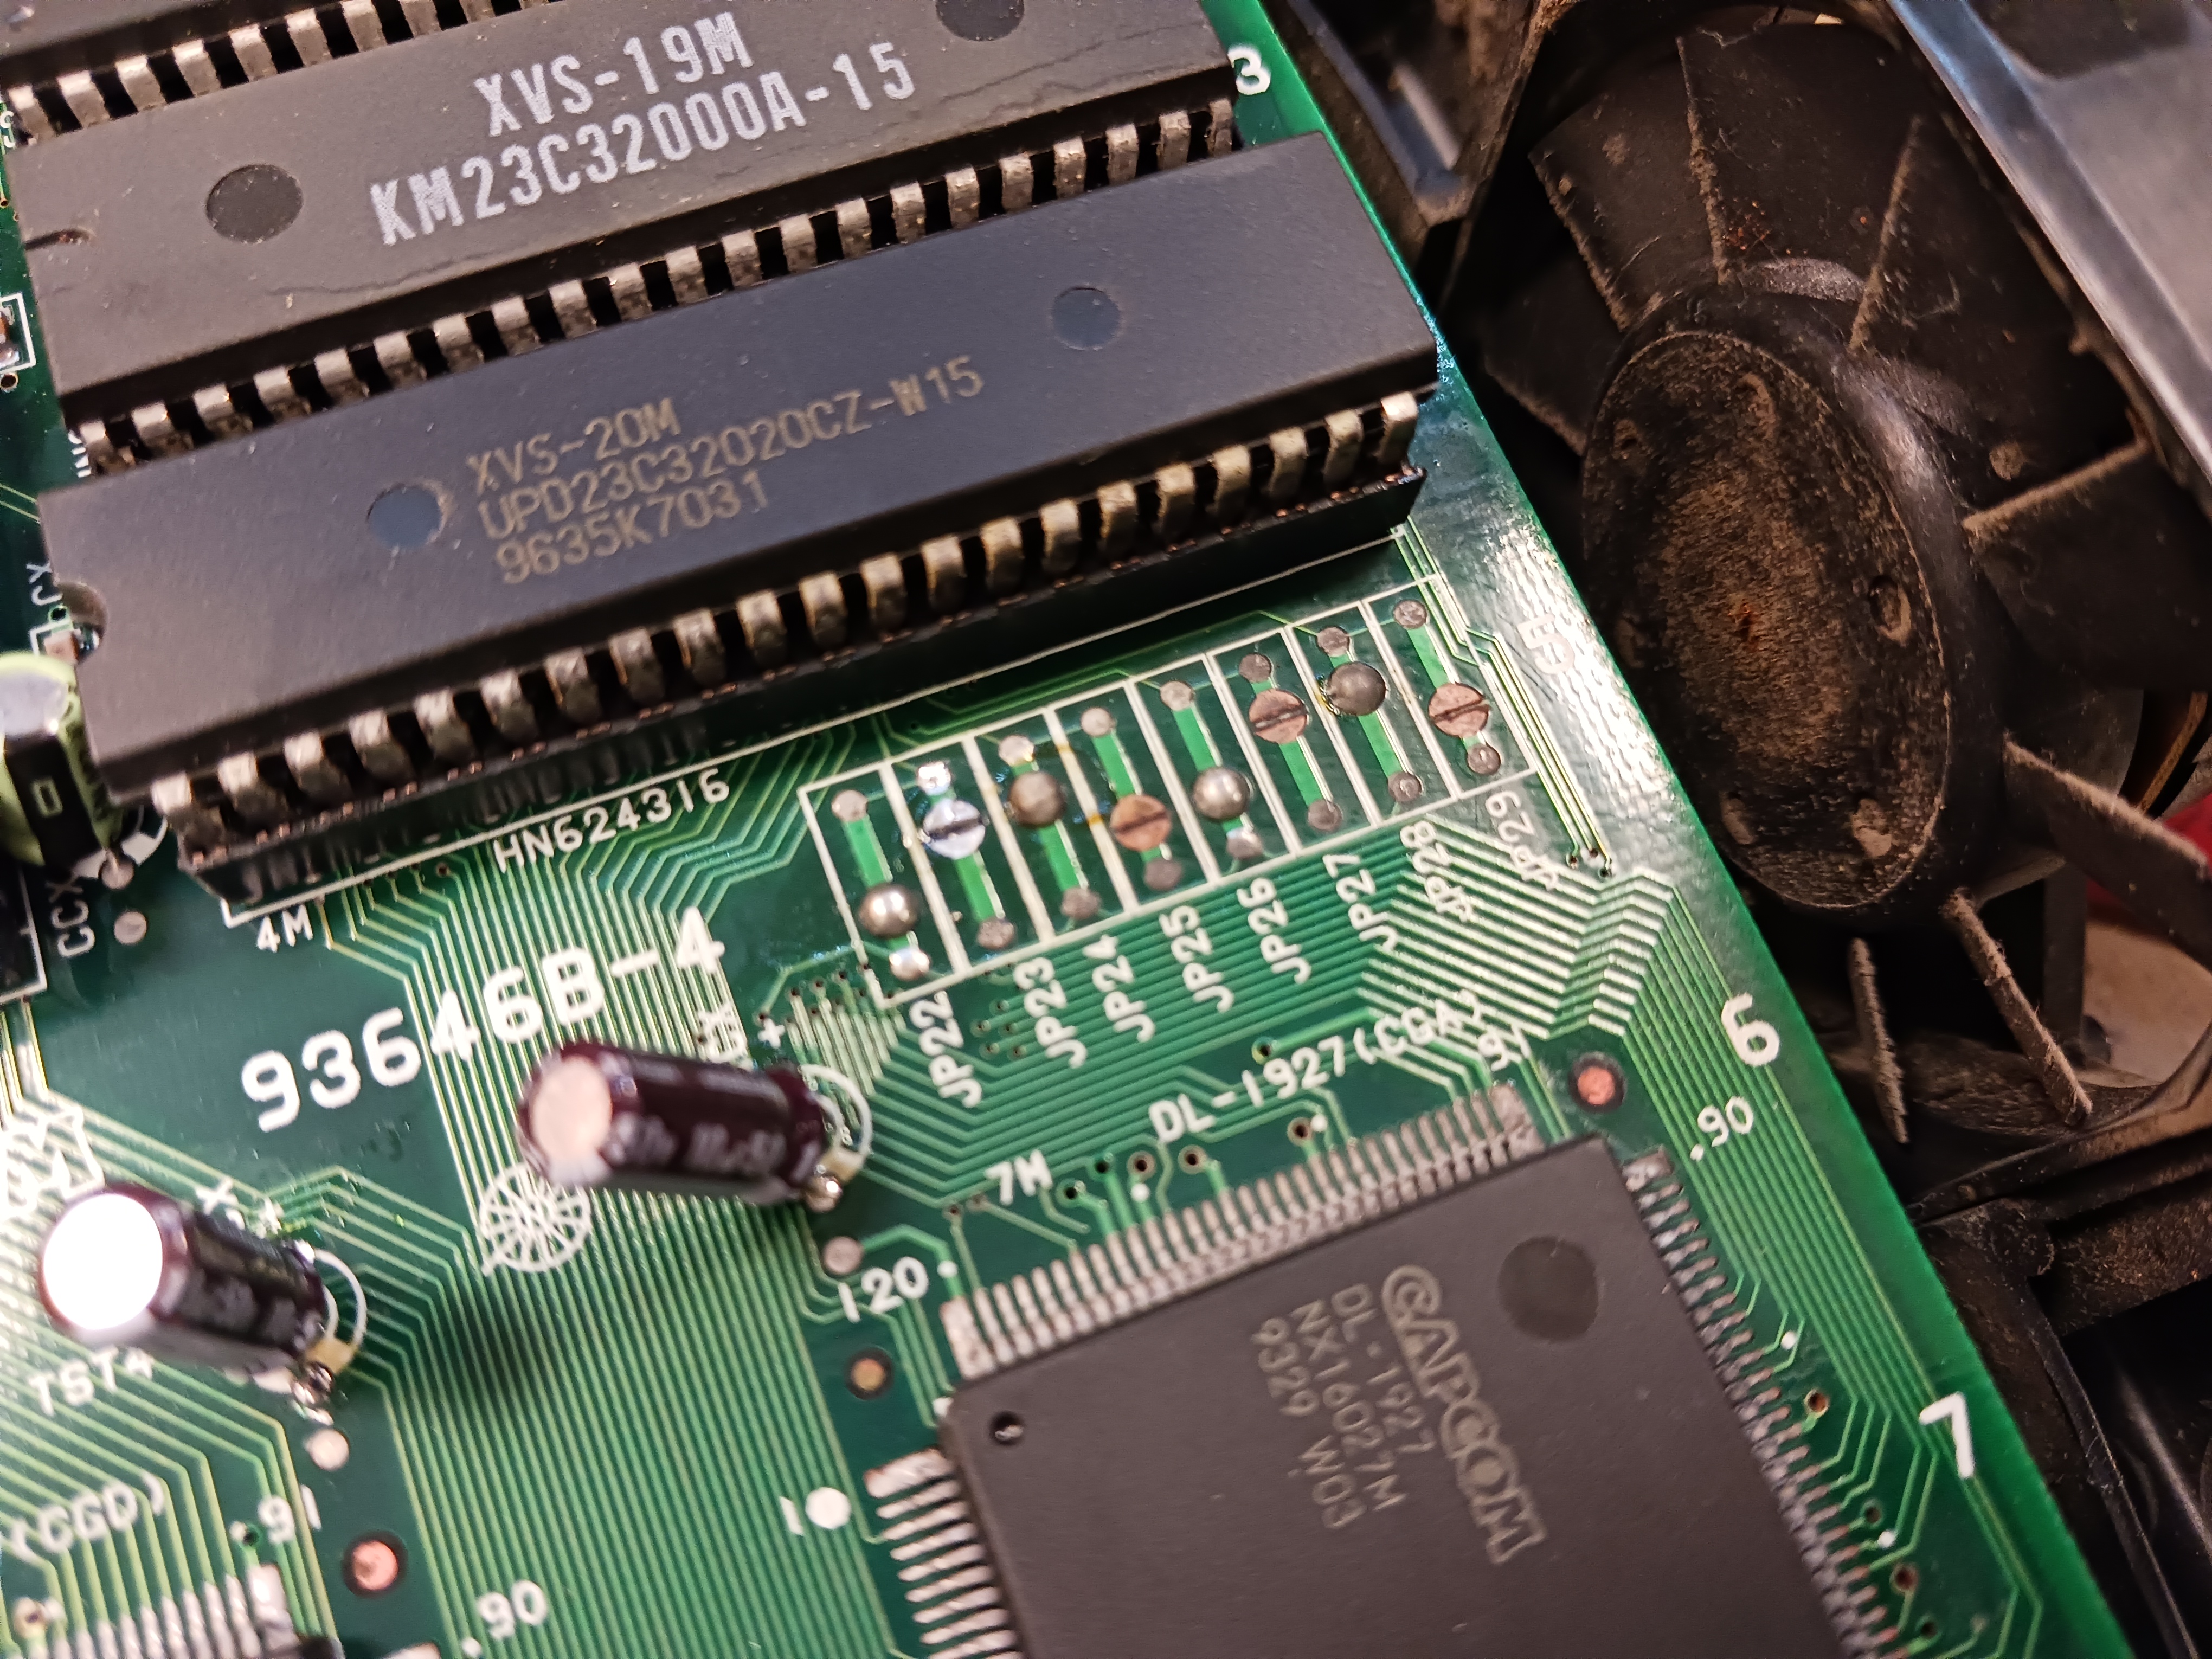
PROTIP: be sure to take a “before” picture of the jumper pad configuration before doing anything (seen above). the pads had turned to a bronze color, usually indicating I guess that the toilet bowl cleaner found something chemical in nature there that it didn’t like and thus tried to remove. the traces where the pads supposed to be open and not connected were beeping with my meter continuity test, which told me the board was now jumpered incorrectly and would totally explain why I had graphic glitches.
I added and removed solder at the pads to clean them up, then tested each trace to make sure they were open (they were now)
using my “before” reference picture I configured the jumper pads as needed and would you believe…
the graphics were fixed
so that was my experience with de-suiciding a CPS2 B board. I decided to document the entire process because these boards don’t all fail the same way when the battery dies. how the battery behaves when it dies could be attributed to storage conditions, I’ve seen some where the battery was all intact but drained and a level 5 as mentioned previously that wound up destroying the whole B board. I hope this is helpful should you encounter one of these potentially catastrophic failures. 😮
also if this is X-Men vs. Street Fighter, why are Ryu and Cyclops shaking hands like they’re allies?